Versatile Blogger

As the rules state, you must:Rule # 1.) Thank the person who gave the award.
I am bursting with JOY! Thank you so much to MrsPicasso'sArtRoom, Art Project Girl, and Tisalou for giving me the Versatile Blogger Award. It is so nice to know that I am achieving my goal of helping other teachers. Thank you so much ladies! For having a blog less than a year, this is a nice surprise! 


Rule # 2.) Share 7 things about yourself:
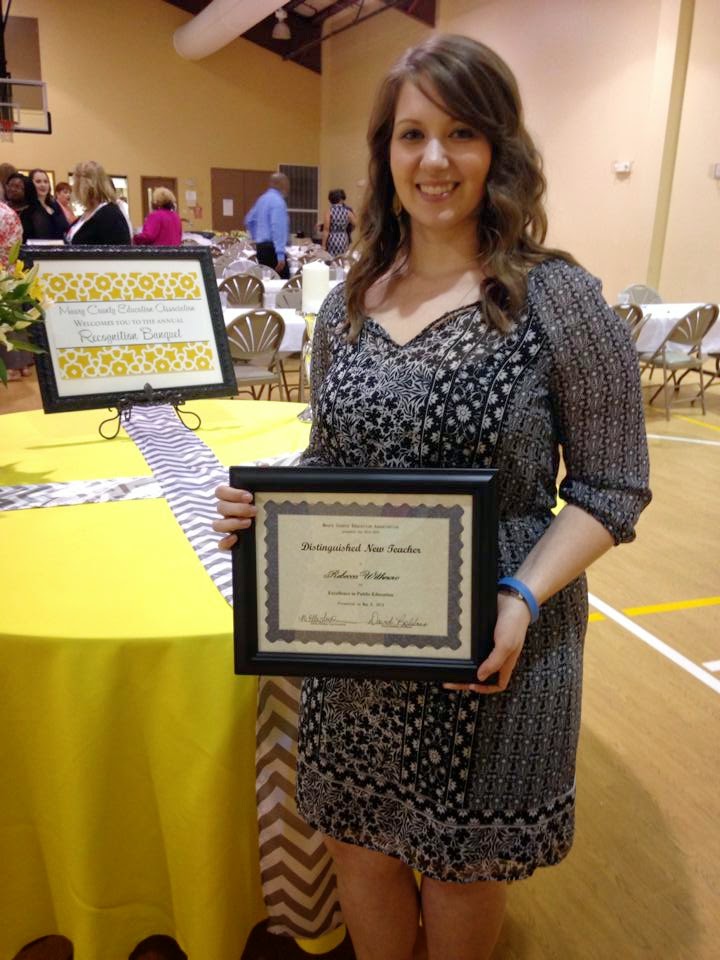
1. I have only been teaching art for "technically" a year and a half! But I can't see myself doing anything else.
2. I am getting married in October! So between work and blogging, I squeeze in the wedding planning. 
3. I am a huge animal lover!! My fiancé calls it my obsession!
4. I was raised on a horse farm and I have shown flat shod Tennessee Walking Horses my whole life! If I wasn't teaching I would be working with horses.
5. I'm addicted to the internet, especially blogging.
6. I am a third generation teacher.
our engagement pics were taken at Burgess Falls in Cookeville, TN by Sarah B. Gilliam Photography
7. Though addicted to the internet I would rather be outside in the great outdoors.


Rule #3) Pass the award onto 15 other bloggers you have recently discovered and enjoy.
Many of these fine people may have been nominated already, but what the hey they have all helped me so much!

2

Splatter without the SPLAT!

Of course Splatter Painting is a ton of fun! But not a ton of fun to clean up!

4th & 5th graders learned about Abstract artist Jackson Pollock and his "Action Paintings"!
Materials: any size paper, cake tempera paints, brushes, water buckets, paper towels, straws! 
Students load their brushes with water and paint. Paint must be watery and blotted onto the paper. Before the paint dries, students blow through the straw onto the paint. The paint will create awesome Jackson Pollock effects!
The best part about this project was watching the students mix the colors and seeing the amazing outcomes! 


7

Art Marks

I would first like to thank Mrs. Brown for this inspiration! It is already a huge success!
At the end of each art class I give the class a mark. GREEN for a great day. YELLOW for an okay day with a few noise level reminders. Finally, RED for a not so good art day with a lot of noise reminders and even a "No Talking" on the board. 


At the end of the year, the class from each grade with the most GREENS wins a surprise party!!


I like for the students to be able to communicate during "working time", but they must use "Table Talk Voices" and keep working. If an individual gets too loud or is not working, then check out my "Pull Card" system. 
4

Printmaking w/ 6th grade


When a new 6th grade class comes in they always ask me..."Are we gonna make stamps?!" The "Stamping Project" is a lesson on printmaking, and the students love it!

Materials: 4"x6" copy paper, pencil, ebony pencil, Blick Blue easy to cut kit, printing ink, brayers, wooden spoons, 4"x6" various colors of construction paper, 4"x6" newspaper or newsprint, 11"x15" construction paper for matting, water bucket and sponges for clean up

We discuss the work of Andy Warhol and the printmaking process. Positive/Negative Shape is the element of art that I emphasize in this lesson.
Printmaking Vocabulary


Printmaking: A process in which an artist repeatedly transfers an original image from one prepared surface to another.


Relief printing: a form of printmaking in which only the raised areas of the block are printed.


Plate: the surface on which the image is prepared. It can be wood, stone, linoleum or a variety of other materials including cardboard.


Safety Kut: a type of linoleum, which can be used on both sides.


Gouge: the tool used for carving away the negative shape in your design. It comes with a variety of different blades.


Brayer: the rolling device used to spread ink onto the plate and then onto the block.


Baren: a circular tool used to transfer ink onto paper by friction.


Edition: the total number of identical prints (copies) made from one image.
The Process


  • Once your design has been approved, trace the design heavily in ebony pencil 
  • Transfer to the plate by turning it face down retracing your image with pencil on the back, this will apply the pressure needed to make the transfer. 
  • When the first student is done transferring, I will give a carving safety demo!!! I also tell my students that the gouge is a weapon if taken out of the room. 
  • *Tip* number your gouges and assign each student a number. Have them check it in and out every time they use it!
*Please note that this student is carving toward his hand! A big No No which he was advised of after I reviewed the pic and noticed it....

  • The negative (white) shapes will be cut away using gouges leaving the raised positive shapes. Remember to cut away from you and your hand
  • Cut deep enough so that your negative spaces are lower than your positive. (Blick's easy cut blocks have a blue or red inside that show you have carved deep enough)
  • Teacher check of plate

  • *Tip* I have one table that is the "Inking Table". All the mess will stay in one place! I have 8 ink colors and set them up around the table each with its own brayer. Students are instructed to use the ink in that exact spot! Spoons for barens are also placed in the middle of the table. ALL STUDENTS MUST WEAR APRONS AT THE INKING TABLE!!  

  • Squirt a nickel sized amount of ink on the table! Ink will be spread by rolling the brayer through the ink up and down, left and right till you hear a "tacky sticky" sound. Roll ink onto the plate left and right and top to bottom. 

  • *Tip* I have students make a newspaper proof to check that they have carved away all negative shapes
  • A 4"x6" sheet of construction paper is laid on top of the inked plate and a baren (back of spoon) is rubbed in a circular motion on top of this to transfer the ink to the paper. 
  • Pull the print off by pinching at the corner and pulling across. This is called “pulling” the print.


My criteria for this project:
1 newspaper proof
4 - 4"x6" prints matted on 11"x15" paper
(Students are advised that more than 4 prints will have to be made and kept before you will end up with your 4 best prints!)
We hang them on my clay rack to dry!
Cleanup: 
I go down the roll and assign 8 students to clean one color ink with water and a sponge
2 students take 4 brayers each to the sinks to clean
other students cleanup the rest of the room if needed


4

Keeping it all Straight

Keeping up with work can sometimes be hard. Handing back work can take forever! So I came up with a way to cut back on time and keep work straight.
Pictured below are my class cubbies. I do wish they were bigger. Maybe my fiance will build me bigger ones one day :). Every class has a cubby and unfinished or "continuing" work is kept here. 
Inside of each cubby is a set of 7 "folders" (12"x18" folded construction paper). Why? Because I have 7 colored tables in my room. When students are cleaning up they place their work inside their "table folder". The folders are put into their class cubby. Easily accessible for me to hand back on another day and perfect if a student forgot to write their name on their work.
Finished work is also turned in via the folders and graded. I will give the work back to the students in the folder and each student will put their work into their portfolio and record the grade on their art grades log. 
8

Art Helpers

With 5 minutes between each class, I hardly had time to get all materials out that the students needed. So I devised a plan of action that I learned at the NAEA Conference in New Orleans that would help me save time and teach students responsibility.
ART HELPERS!! 
Many of you probably already use them. I find it so fascinating how kids never like to clean their room. But cleaning up at school is the coolest thing!! 
Works for me :)
I put labels on the back of all my chairs. This year's theme is "Wild about Art". So I chose animal names. The word Zebra is on the back of the chairs in this picture. The word Monkey is on the back of the chairs on the other side of the table. I also label with a number. 
Example: Zebra 1 and Zebra 2
"Zebra 1s, please pick up a basket of crayons for your table
Zebra 2s, get paper for each person at your table"
and same at cleanup time. 
I have a sign in my room that posts the Art helpers. They change monthly and students never have to ask "who are the helpers?"
This system has made my teaching so much easier! And the students love it!

A Pleasant Surprise

Today was registration day at school. My duty on this day is to inform the students of who their teacher is. I love seeing all the new and old faces of students. Some happy faces and of course some not so happy faces. One student walked in the front doors with a huge Wal-mart box of supplies. I was surprised to see him with all that stuff. I asked, "What lucky teacher gets all that!?" and he replied, "You!" I was floored. I couldn't believe that a student and his family had gotten all those supplies for me over the Summer! 
I just love surprises! 
2

Time For School

School starts back this week, so I will be taking a little break from posting.
Keep checking back!
2

Room Update

The room is almost finished! Just little things left to be done. If you remember my last post about The Art Room you may recall I wasn't too thrilled about one of my displays. So I changed it up and I am much happier. Please enjoy these snapshots!
Before
and
After
I love the tree! It's hard to see, but it says Elements & Principles in the leaves.
The bark effect was done by crinkling up the paper!
The bookshelf looks a bit empty but will soon be filled with class portfolios. 
 
Toothless and friends
The Behavior Board is coming along nicely. I need to make the 5th grade pockets and complete the consequence pockets. The consequence pockets will look like little cages that the students will drop their card in if the break a rule.
My consequences are: Warning - 5 minute Time Out - 10 minute Time Out - Detention
Knock on wood I have not had a student in Detention!! 
I will post about a reward chart later :)

 Front and Back


The Clay Corner and Storage closet

 
Teacher Prep corner

0

Fall Collages

The inspiration for this project came from Deep Space Sparkle.
I changed it up a bit for the 3rd graders.
P.G. 3rd grade
Sorry I didn't take more pictures. This one doesn't look to Fallish...
Fall Collages
Grade: 3rd
Time Frame 
three 50 minute class periods
Goal/Purpose
To introduce students to the Collage process by using textured painted papers.
Objectives
TSW learn that a collage is a form of art in which various materials are arranged and put together to create a piece of art. 
TSW paint two papers using different colors of paint to create contrast.
TSW use various objects to create texture on wet paint.
TSW create a collage with the painted papers by cutting out shapes to create pictures.
Special Prep:
I set up my demo table to hold all the "texture tools"
Vocabulary: elements and principles
Collage, Texture, Contrast, Craftsmanship, Painting
Materials:
12"x18" drawing paper, tempera paints, painting supplies, texture tools: forks, cups, etc., Fall colored 12"x18" construction paper, Elmer's Glue, Scissors, pencils
Procedure/Instruction:
Day one I displayed a couple of collages I had created as we discussed what a collage is or what makes this a collage. I always like to show an example and then ask the students questions that will lead them to telling me what makes it a collage!
Every student starts with one 12"x18" paper; writes their name, table, and code on the back and paints the front one solid color. They then chose a contrasting color to paint on top of the first and used "texture tools" to create textures.
Day two the process was repeated with the second piece of paper and different colored paints. While paper #2 dried, students picked up their fall colored construction paper, the 1st painting, and began to brain storm. 
I teach students to draw on the back of their painted papers so they won't have to worry about erasing lines after they cut the shapes out. (but this won't work with words)
Instruct students to arrange the shapes on the paper first to see how it looks and then glue. 
I remind students to use "baby dots" when gluing!
Day three students continued to draw, cut out, and glue shapes to create their collages. 

0

Back to the Basics

 < The TODD Art building at Middle Tennessee State University
Where I received my Degree in Art Education 


  I have decided to get back into really "writing" lesson plans. Usually I just give the cut and dry. Before I teach a lesson I usually jot down the "key point" on an index card. Some school systems require you to turn in the "real deal" lesson plan. But, I am a bit out of practice. I turn in only 3 a year by requirement and the teachers at my school are required to turn in the weekly lesson plans every other week. This is just printing a copy of your weekly planner. That's fine. I am happy to do it that way.
   Though we are taught how to write lesson plans in college and taught well. In the real world.... there isn't always enough time. I feel I do need to hold on to that lesson plan template. In fact, when I type emails, I try to type them the same way as if I was still in Freshman Composition 1. The new age is wonderful, but he need to hold on to our roots before we start to literally say "OMG!" The point to this? I will do my best to post my lessons in the lesson plan format!!!! I did say TRY....
   So in case I peaked your interest and you too want to remember the lesson plan layout, here is how we do it in Tennessee. 


Lesson Plan Layout

Project Title:

Grade:

Time Frame:

Goal/Purpose: What is your goal and or purpose for this lesson.
            (objectives come from the goal/purpose)

State Standards

Objectives
            The student will:
            Based on art history, production, aesthetics, and criticism

Preparation:

Vocabulary: elements and principles

Resources: books, films, notes

Materials:

Teaching Strategies
Set: motivation – preparing students to learn

*Procedure: step-by-step

Instruction:
            Visual and verbal demonstrations
            Check for understanding
            Guided practice
            Independent practice
            Closure

Evaluation
5

Swish, Wipe, Blot

Sorry for the blurry picture.

I learned this little slogan from Mrs. Pam Hickman that I student taught under. It used to be: Dip, Wipe, Blot. So with a little modification 
Swish, Wipe, Blot 
was born.
Students learn that we need to take good care of our paint brushes. We don't want them to have a "bad hair day"!
Swish: by making circles in the water. No Tornados!
Wipe: to get rid of the drip drops
Blot: 1 time to check it's clean
Students also know do clean their brush when they need to change colors. 

2

More Art Room Stuff!

Again, I love this year's school theme
Wild About ______
Thanks to Hobby Lobby I am stocked on beautiful animal print patterns!
Different colors mark the different categories

All my tip instruction signs are "Wild"

Toothless has a new home. He looked a little bored just sitting on the filing cabinet.

Trying to display as many "animal" artworks as I can find. I thought this Andy Warhol image fit quite well.

Not too sure about this one.... I think tomorrow I will change this up...

0

Op Art

I got the idea for this project from Blick's Art Lessons. Please see directions on the link for instruction
This project is one that will be slightly revised by myself. It was a tuff project for many students to grasp, but once they got it, the results were AWESOME!

COVERED IN THIS LESSON
Op Art
Space
Shape
Pattern
Contrast
Marker usage

TIPS
I would have the students practice A.B. Patterns on a worksheet before beginning this project. The difficulties seemed to arise when the students had to move onto the next row. They did not understand what color went next. This is why practice is important.
Have students start in a corner and fill in each area by "snaking" around the paper to the next row. This cut down on confusion.

New Year, New Look

This school year the A.R. theme is "Wild About Reading"
so let's roll with it 
"Wild About ART"
It's a little hard to tell, but animal print is going to be everywhere!!
I will be working in my room this week. So expect to see more Art Room posts.
Back to Top